Showing posts with label side table. Show all posts

Wednesday, October 14, 2015

My Juliet Nightstand


This sweet little nightstand is the perfect addition to any room.  Inspired by the Juliette Nightstand from Pottery Barn Kids, I wanted to create it using some leftover materials I had from previous projects. 


The top, sides and shelf were constructed from mdf.  The legs were cut from a spruce 2x4 that I ripped down on my table saw to a square 1.5" x 1.5" post.  The adorable little curvy “feet” are actually from a pine stair baluster!  I chopped it down into pieces and by drilling a small hole in the top of the “foot” and the bottom of the table leg, I was able to glue them in place with no worry of them moving around.


The drawer interior was built from 3/8” plywood.   I cut a dado groove along the bottom for a 1/4" plywood base to fit in.  The drawer was then installed with simple white drawer glides.  The adjustable lower shelf sits on simple chrome shelf pins so it’s quick and easy to adjust.


The soft white paint colour and clear coat in a satin finish was perfect for the table.  And of course the glass drawer pull was the finishing touch!

This lovely little table has been sold.

Thanks for popping by!


Sunday, May 17, 2015

Reclaimed Beauty


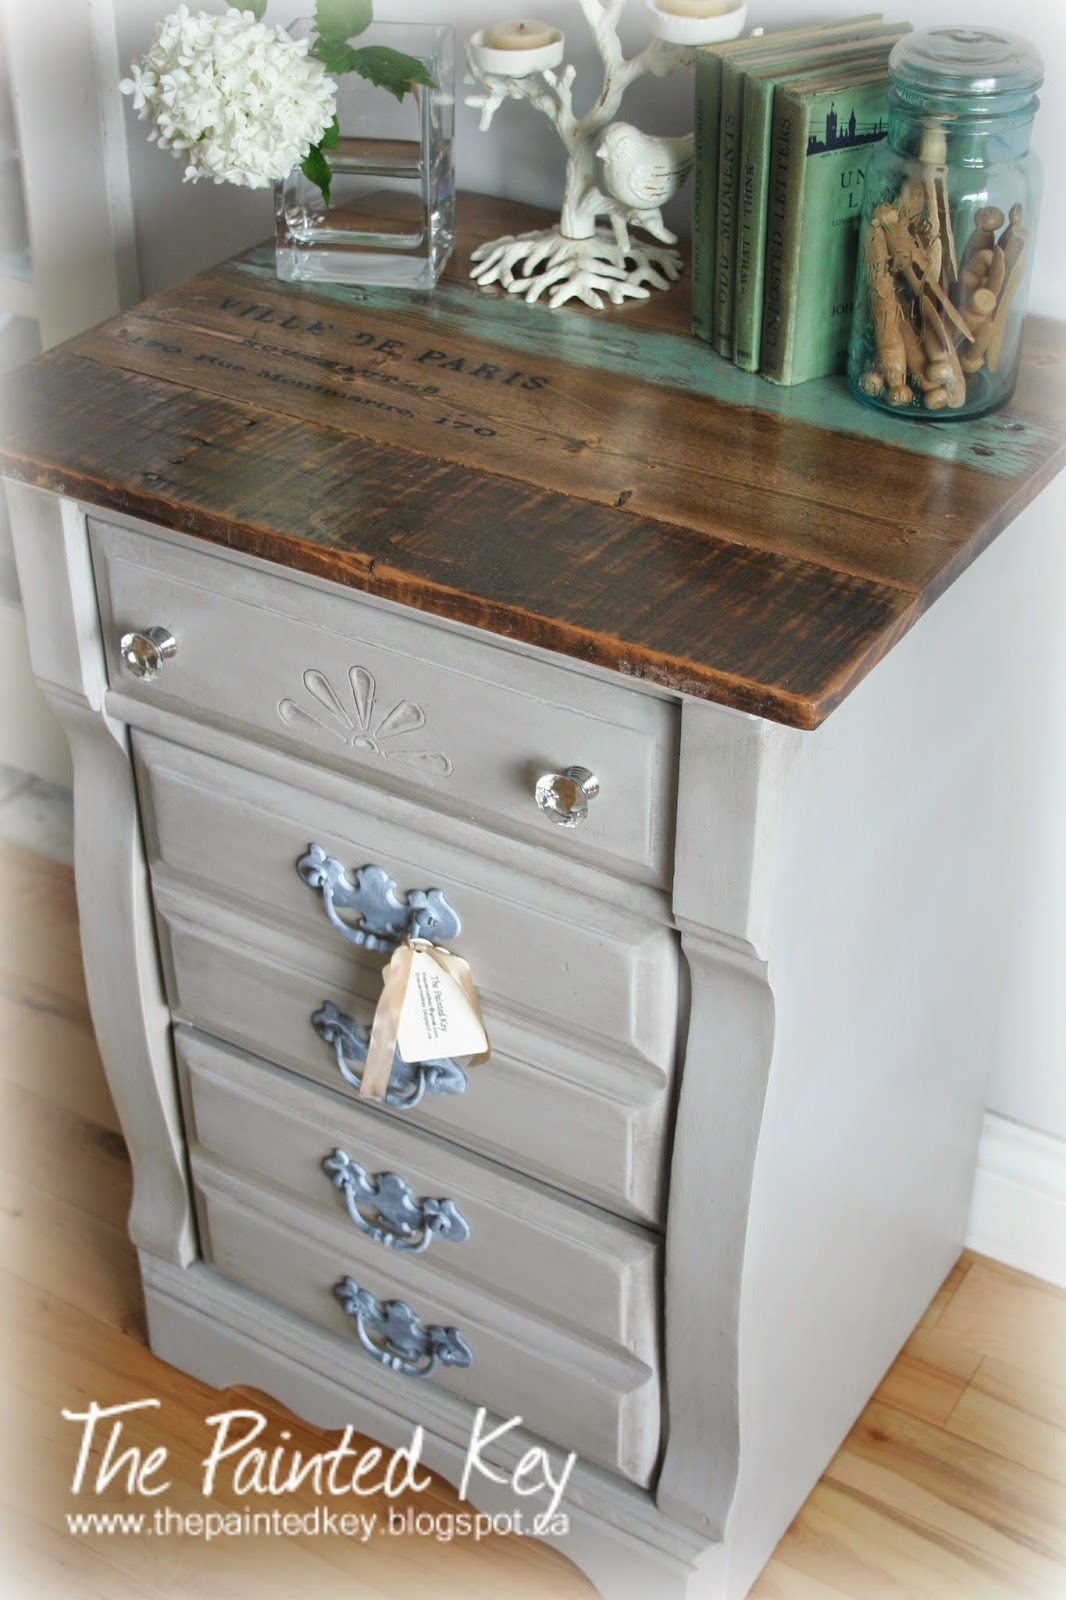
I picked up this piece as part of a set last year which also included a dresser and pair of side tables.  I refinished all but this one.  I wasn’t actually sure what to do with it!  It was an odd piece.  The base was square, but the top had a sort of triangular top that just seemed awkward.  I actually forgot to take a "before" picture, so this is the one I originally pulled from the sellers ad.


Because I’m on a mission to clear out my workshop and actually give myself more room to work, I knew this piece had to be finished sooner than later.  The top was long gone (I got rid of it shortly after I got the piece home) but debated what tdo replace it with.  I finally decided I would use reclaimed lumber.  Sadly, once I actually started piecing it together, I realized the lumber I had wasn’t going to work the way I wanted and really only had one good piece to use.  I decided to work with it and just used a couple new pieces of lumber as well which I distressed before staining.  I also added a simple French inspired transfer before finishing it all off with a glossy poly.


I started with a  light grey on the base and decided to add a dark glaze to give it a little depth.  I also tried a new clear coat product suggested by my local Benjamin Moore retailer.  It’s a water based clear varnish but in a “dead flat” finish.  I love the way it looks!  It has a subtle sheen which I find gives the look of a waxed finish.  I likely won’t use it on all my pieces as I still love the modern look of a glossy piece of furniture, but for a slightly more vintage look I wouldn’t hesitate to use this finish again.


I chose to use the original hardware on the bottom drawers.  They were originally a dated brass look and so after a few different paint colors, the updated finished look reminds me of aged zinc. A pair of glass drawer pulls on the top add just a little sparkle.

While I normally line the drawer interiors with a vinyl, I chose to leave these as is.  The original vintage-.look paper already in them just finish off the piece perfectly.


I’m so happy with the finished piece.  I honestly didn’t have much of a plan when I started on it and just let it develop as I went along. 

If you would like to add this piece to your home, please let me know.  Now available in my shop. 

Thanks for stopping by!


Friday, July 18, 2014

Sweet Petite...


Here’s a super quick blog post about a cutie little night table I had finished painting and then set aside. I came across this night stand last year and was pleased to see it was in decent shape – other than the current paint job which wasn’t quite my taste.  (Pic is from the original online ad)


I decided to keep it simple and give it my regular paint treatment.  Good sanding, primer, crisp white paint and finished with a glossy clear coat.  


As mentioned, the  table was in great shape - drawer was spotless!  


You may have noticed the drawer is missing a pull.  I actually finished painting it over a month ago (could have been 2 months…) but knew I didn’t want to use the original drawer pull, but instead go with something unique.  Unfortunately, I hadn’t yet come across what I wanted (not really quite knowing WHAT I wanted).  Anyway, when one of my good friends mentioned she was finishing up a room and searching for a bedside table and asked if I had anything, this one came to mind.  She already had hardware she wanted to use, so it worked out perfectly!  I can’t wait to see the finished room all put together. 

Have to apologize for the poor quality of my “after” pics.  I actually took them with my cell phone.  Normally I take the time to properly stage and photograph my furniture pieces with my good camera, but it’s been a busy/crazy week and I just needed to get pics taken asap!

Thanks for popping by!
 

Wednesday, October 16, 2013

A Sweet Little Night Table


Another DIY project for the townhouse!  


Partway through the reno, I had an itch to build something, so using some scrap lumber I had on hand, I decided to build a small little night table knowing we could use it for staging the third bedroom.

I cut all my lumber one afternoon and with the nice weather we were having at the time, I was able to spend some time assembling it in the backyard while my kids were playing.


For the top I used a scrap piece of MDF and routered a decorative profile along the edge.


To make assembly quick and easy, I used my Kreg Jig to drill all the pocket holes.  I knew I would want to hide them in the end, so using a 3/8” wooden dowel, I had my boys help me make our own “pocket hole plugs”…with a little glue, they slide into the pocket hole, and then after a small dab of wood filler, can be sanded smooth and painted over!


I wanted some cute little “feet” on the bottom, but wasn’t willing to spend a ton as the rest of the table was built from leftover scraps and I wanted to keep this as close to "free" as possible.  I went to one of our local lumber yards and picked up two wood stair balusters.  I cut off the portion I wanted, added some wooden dowel and was able to use that to attach it to the side table.  Perfect!  


After a coat of primer, some glossy paint and a single glass drawer pull for some sparkle, the table was completed and was perfect for the townhouse!  


Once the townhouse sells, I haven't decided if I'll be listing this one or keeping it for my daughter. ;)

Thanks for visiting!


Friday, July 19, 2013

Table x Two


These solid little side tables were part of the same furniture package that included this sofa table I refinished.   


A friend had asked me if I had any matching side tables in my furniture stash and so I set these aside to work on when I had time.  Eight months later (ack!) I finally dug them out!  She had already expressed interest in the desk and hutch I just finished and asked if I could refinish the side tables to match.  I started by stripping the tops .  I don’t know what sort of finish was on them, but whatever it was definitely took a LONG time to get off!   


After chemical stripper AND sanding, it still left a slight sheen in spots…of course, these only showed up after I started to apply the first coat of stain!  Out came the sandpaper again.  I think it happened twice?  Anyway, after 3 coats of stain (not including the previous coats before I had to sand it off again!) I finished it with 5 coats of poly. 

The base of each table was primed, sprayed in a crisp white satin and clear coated.   Once again I'm lovin' the curvy legs!


The drawers were painted to match the recent desk makeover, sprayed in a beautiful blue/green satin and clear coated.  


Even though I’ve had my paint sprayer for almost 2 years, I’m still learning new little tricks with it.  I am beyond thrilled with how smooth and glassy the drawers turned out!


I lined the dovetail drawers with the same  black and white vinyl I used in the desk.


The original drawer hardware was not only ugly and dated but the screws had been completely stripped, were bent and lodged so tightly in the drawer pull that the only way I could get them off was to actually ask my dad to take a metal grinder to them.   

 
I knew I wasn’t going to be reusing the hardware, so I didn’t care if they were damaged.   When it came to new hardware, I made the mistake of only measuring one of the side tables.  A lot of old furniture hardware is 2-7/8” on center…pretty much all new hardware is 3” on center.  The table I measured was the 2-7/8”.  They’re older tables, so I wasn’t surprised and ordered two new drawer pulls - at 2-7/8” -  from Lee Valley Tools.  A week later my order arrived and I couldn’t wait to see what the hardware looked like against the drawer color!  The first one went on perfectly.  When it came to the second table, I realized immediately I had a problem!  The spacing was wrong!!!  I grabbed my tape measure and sure enough – the holes were 3” on center!  ACK!  Looking at the “before” picture now, I can definitely see the difference, but at the time I didn’t even take a second glance at it!    

I had two choices – I could attempt to find new hardware that came in both sizes…or fill in the holes and redo the entire drawer from scratch (sanding, priming, painting, clear coat).  I tried to find new hardware, but nothing even came close to the hardware I’d ordered.  It was too late – I’d already fallen in love with it and nothing.else.would.do.  SO,  I filled in the holes and started over on the drawer.  While frustrating, it was all forgotten when I saw both tables with their gorgeous new hardware.  


And another before & after:


I hope these tables will work well in their new home! 

Thanks for popping by!