Thursday, September 20, 2012

Abandoned Beauty

I’m always surprised at some of the things that are abandoned at the end of someone’s driveway!   Of course, I admit I do feel a little excitement every time I see that “free” sign perched on an item! 

My parents came across this beautiful little desk and decided to rescue it not knowing if it was actually a project I’d want to take on or not.  Of course I did!  I fell in love with those adorable little drawer pulls immediately!  

(Click on any of the pics for a closer peek)


The desk had certainly been through a lot.  The veneer along the sides was chipped and peeling, the original finish was definitely worn in areas, the desk surface looked like it had become someone’s sketch pad and some of the hardware was even on upside down!
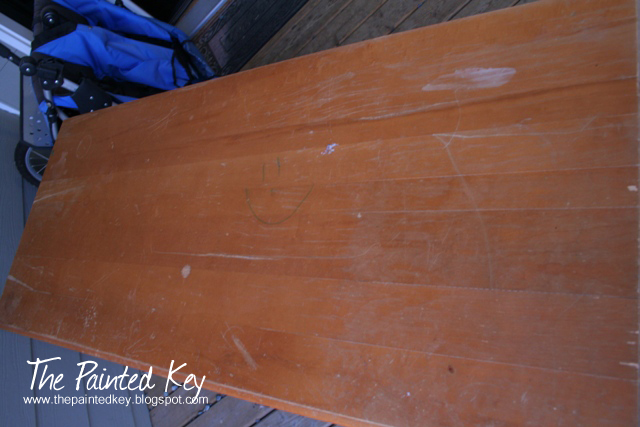


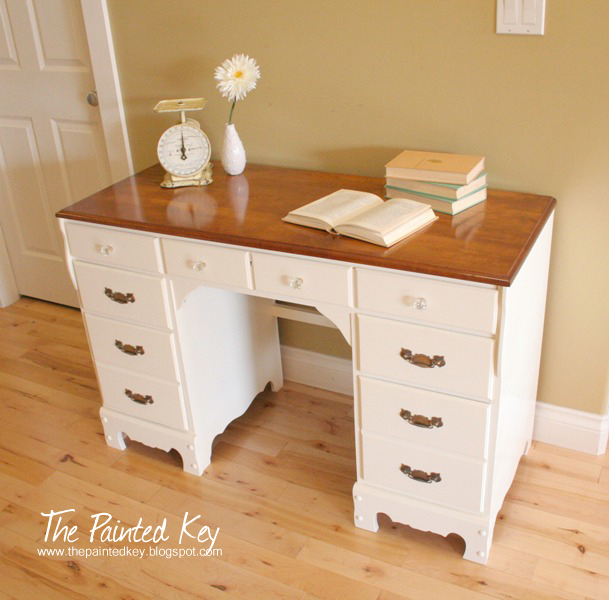
My first thought was to paint the entire thing.  I was a little hesitant though wondering if the desk surface could be rescued and refreshed.  I decided to take a chance stripping it down knowing that if it turned out to be a mess, I could just paint over it.  While using paint stripper certainly isn’t high on my list of fun activities (it’s messy and time consuming!), I’m so glad I took the chance.   After a few hours of scrapping and sanding it down, I was thrilled to see an “almost” perfect top.  I restained it with a rich chestnut stain and followed that with 4 coats of polyurethane for a gorgeous glossy finish.  


Once that was finished, I taped off the top and started working on the bottom and drawers.  I had already glued and clamped the loose veneer, but still had a lot of work to do filling in the remaining damage with wood filler!  Once I had it primed and sanded smooth, I sprayed on a few coats of a beautiful creamy white satin paint followed by a few coats of polyacrylic.  I always use a water based non-yellowing polyacrylic over my white or light colored pieces.


Ahhhhh....look at that gorgeous shiny reflection!


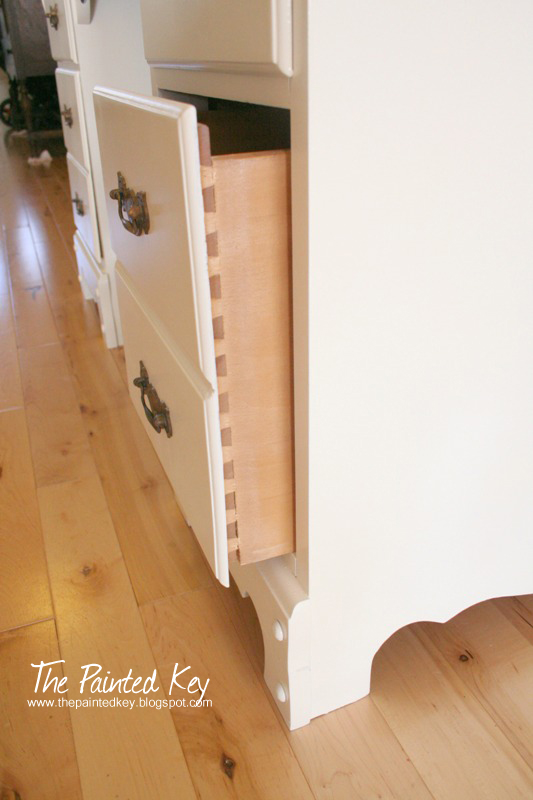
All the drawers are dovetailed which I just adore!  It's just that extra bit of character that so many new pieces nowadays don't seem to have.


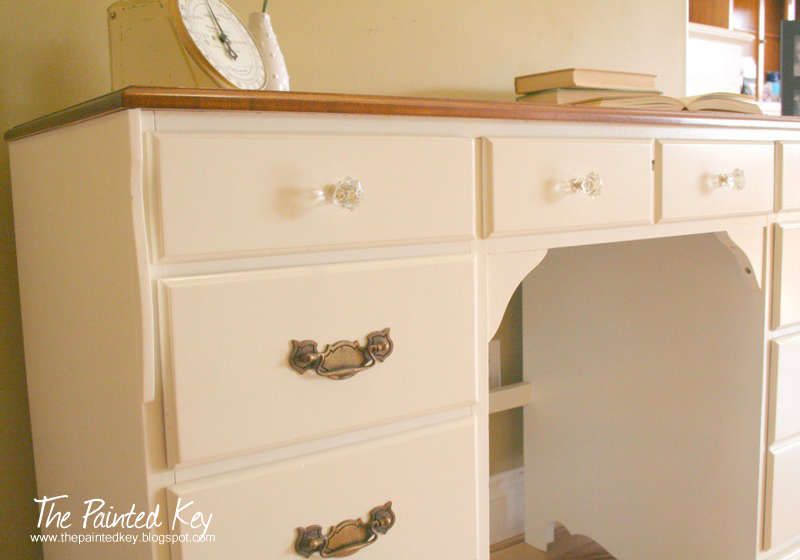
Because I loved the original hardware, I chose to reuse it.  After a 2 hour soak in a salt and vinegar hot water bath, I scrubbed them to remove the years of built up dirt and grime.  Unfortunately one of the pulls was broken with the actual handle missing, so I chose to replace the hardware on the upper drawers with some beautiful vintage glass drawer pulls I had on hand.  Switching from a 2-hole drawer pull to a single one isn’t difficult – just a little more work.  I filled the existing holes with putty, let them dry, sanded them smooth and added a second coat of putty.  Putty/wood filler has a tendency to “settle” while it’s drying, so I find it always need that second coat.  Once the second layer was dry, I sanded it again and then primed and painted over it.  With some quick measurements, it was quick and easy to drill a new hole for the single drawer pull.
  
I am very happy with the way this piece worked out and I’ve already had a lot of interest in it.  I hope it will work well in its new home!


Thanks for popping by!
 

Monday, September 3, 2012

THE China Cabinet


The china cabinet.  THE china cabinet.  THE EVIL china cabinet!  Where do I begin.  When I first got this piece, I actually thought it would be a fairly quick project.  I loved the look of the detail along the top of the hutch and couldn't wait to get started.  Unfortunately, it took a lot longer than I had anticipated.


I started off by removing the front doors and all the hardware.  After sanding it down, I applied a coat of primer.  I already had a few other pieces in my garage I was also working on, so the front deck became another “work space”. 


Like the grey buffet I recently finished, I chose to leave the interior of the lower cabinet unpainted.as it was in excellent condition. 


While the main part of the buffet was simple to paint, the doors decided to give me some grief.  I had sanded, primed painted and had just started to apply the clear coat when I realized that the doors were developing some yellowy spots!  It seems that the old original finish was working its way through the primer and paint!  I always use an oil based stain blocking primer to prevent this, but I guess my coverage wasn't adequate enough (serves me right for painting at night in a poorly lit garage) and that darn finish was going to prove it!  I needed to basically start over from step one and sand, prime and paint AGAIN before I could add the clear coat.


This particular piece was custom painted for a friend and she had requested a bright white, but asked if  could replace the glass with chicken wire.  Because I had replaced a previous cabinet glass door with wire with no issues, I thought this would also be a simple job.  It was not.  After I had painted the entire interior, I went to add the wire.   


Because the  upper cabinet was fairly narrow, I had to squeeze my upper body into it at the oddest angles along with my somewhat bulky nail gun.  I’m sure I could have just slapped the wire up and nailed it in place, but being a bit of a perfectionist wanting it to look nice I wanted to make sure all the edges were tucked into the existing groove where the glass panels had originally been.  The wire wasn’t being overly cooperative though and the sharp edges were scratching away at the brand new paint!  I lost track of the number of hours it took to complete as well as the number of times I stormed out of the garage ready to call it quits!  I can’t even begin to express how happy I was to finally get it finished...with only two holes to patch after the staples decided to go THROUGH the wood and out the front of the cabinet!

After repainting most of the interior, the entire piece got a glossy clear coat.   


I felt the original hardware worked with the piece and only needed to be updated with some Oil Rubbed Bronze paint.  


Now I would like to say once the clear coats were finished it was all smoothing sailing from there.  It was not.  When I got the cabinet, one of the glass shelves had unfortunately been broken in transit.  I was a little concerned about what a new one would cost, but was pleased to find out it was going to be less than $30.  I measured the existing shelf and ordered a new one.  After I’d completed the cabinet, I grabbed the new glass shelf, put one end in the cabinet and then...freaked out.  The front opening was TOO SMALL to put the new shelf through!  I tried it at every angle possible and even called my hubby into the garage hoping he could figure out a way I hadn’t yet thought of.  No luck.  AGH!  When I took the shelf out originally, I had already removed the side glass panels and just slid it though there  Of course, with the chicken wire now stapled in place, that was no longer an option!  By this point I was so ready to cry.  My ONLY option was to attempt to pry out the staples on the back panel.  Because it was made of that pressboard-type material, I really hoped it wouldn't be damaged too badly.

Using a hammer, a TINY screw driver and some needle nose pliers, I finally managed to pry out enough staples to allow me to pull back the bottom of the panel just enough to slide the shelf in. 


I slid the shelf in and went to pick it up to put it on the first shelf support.  Oh oh – why was the glass shelf scraping the sides of the cabinet?  I grabbed my tape measure, measured it again....and realized it was ½” TOO LONG!!  ARE YOU KIDDING ME??????????  I grabbed my paperwork and realized I’d somehow given the glass company the WRONG measurements!!!!  I had to run back into town to get the glass “trimmed”.  Fortunately it was a quick fix, but I’m sure they were laughing at me after I left!

After may hours of work and a lot of frustration, here is the finished cabinet!  


This had to be one of the toughest pieces I’ve done, but now that it's finished I can say I am really happy with the way it turned out and I hope it’ll work out well in its new home.

Thanks for popping by!


Thursday, August 23, 2012

French Provincial Side Table


I picked up this cute little side table a few months ago.  The picture in the ad didn’t look too bad and the price was decent, so I thought I’d take a look.  


It definitely needed some TLC.  The current finish was a bit rough and while you can't see it in the picture, it had some serious water damage along the top. 

After a LOT of sanding, a few coats of wood filler and then even more sanding, I sprayed on a coat of primer.  I quickly realized that the top was going to still need some more attention.  I forgot to take pictures, but lets just say that the previous wounds I thought I’d taken care of decided to stay visible!  More sanding and wood filler would be required!

After the primer was finally finished, it was time to paint.  At first I thought I would go with my predictable white.  It would be simple, clean, and white seems to sell quickly.  BUT, I couldn’t do it.  I was craving color again!  I had some leftover light turquoise paint from my coffee table project and thought I’d give that a try.   


I liked it, but wanted to take it a step further and give it some depth, so I decided to lightly glaze it with a custom mix chocolate color glaze.  I loved it!

 
I knew I wanted the top a different color.  Because the top was not solid wood, staining it wasn’t an option, so instead I painted it a beautiful rich espresso brown


I felt the existing hardware suited the piece, so I just updated it with a fresh coat of Oil Rubbed Bronze paint.

 
I’m happy with the way this piece turned out.


This piece has already been sold!

Thanks for stopping by!


Wednesday, August 22, 2012

7-Drawer Dresser


I actually forgot to take an official “before” photo, so I’m using the one from the original online ad.  This particular dresser was in decent shape.  

I’m sure there are many stories behind all the nicks, dents and scratches, so I chose to leave them so they would show up in the finished piece.  After sanding, priming and painting, I lightly distressed all the edges and then sprayed on a glossy protective clear coat.


I wrapped the drawers before painting to keep the interiors tidy.  I prefer to leave the interiors unpainted as I find the paint tends to rub off if they are painted.


I had planned to replace the hardware, but quickly discovered that all new hardware is now made 3” on center.  That means 3” from the center of one hole to the center of the other one.  Unfortunately, the hardware on the dresser is vintage and is 2-7/8” on center!  Eek!  Replacing the hardware meant I would have had to fill all the old holes and then re sand, prime and paint the drawer fronts all over again!  NOT an option.  Instead I decided to update the existing hardware with paint – and I am SO glad I did.  I absolutely love it and feel they are perfect with the style of the dresser.


This piece is now available for sale!

Thanks for stopping by!