Well, that was a slightly longer break than I anticipated. While I am extremely fortunate to have a large garage to work in, it’s not insulated, so as soon as the cold weather hits, a lot of my furniture redos have to be put on hold. Cold weather + cold paint = NOT good. I think the break was good for me though – I needed to step back and take bit of a breather. Of course, with the beginning of the New Year, I was chomping at the bit to get back outside and start working on these pieces that have been sitting and waiting for me.
One of the pieces I finally finished was actually “mostly” completed a few months ago. This bedside table was one of a few pieces I purchased from my brother-in-law last summer.
It was in decent shape, but the orangey wood tone was just dated. And the hardware definitely had to go. In “blog-land”, this particular hardware is referred to as “flying bats”. Ha ha.
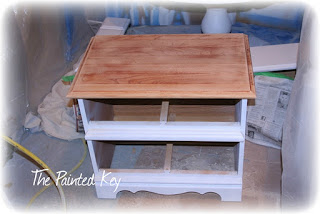
I decided to go with a painted base and stained top. I started by stripping the finish off the top and giving the rest of the piece a light sand and a coat of primer.
After taping off the top, I chose to spray the base with a soft cream colored paint instead of my usual white. I knew I wanted to go with a warmer colored stain and I thought the cream paint would compliment it better.
After 3 coats of paint, it was time to start the stain. I had been debating whether to go light or dark and finally decided on a warm chestnut color. I was really happy with the way it turned out!
After that was done, the cabinet sat...in the garage...for about 2 months. ;) I never seemed to get around to picking up new hardware for it (to replace the “bats”) I FINALLY made a special trip into town this past weekend specifically for it. Fortunately my trip was successful and it actually didn’t take that long to choose!
Although it now looks finished, it’s actually ALMOST done. I still need to add one more coat of wipe-on poly to the top and then brush on a few coats of poly acrylic on the base. THEN it will be complete.
Here’s one last quick side-by-side before and after!
Ahhhh....so much better.
I will be listing this piece shortly, so if you’re interested in it, please let me know.
Thanks for stopping by!
Cristina


No comments:
Post a Comment
Thoughts or comments? I'd love to hear them!