That little saying couldn’t be more true when it comes to this little dresser.
I was told it was free for the taking if I wanted it or it was headed to the dump. It was in rough shape - almost all the drawer slides were falling off, it was missing a few drawer pulls, it had some paint and tape residue in some areas, and had some fairly deep scratches.
After getting it home and inspecting it, I discovered the
main structure was still solid and would only require some cosmetic updates
and some minor repairs on the drawer slides.
I found it a little too plain though so I decided to follow this tutorial I found on pinterest and add some decorative
trim for added character. Before I could
do that, I had to move the bottom support forward to be flush with the front
edge of the dresser. After adding some
wood filler to the deeper scratches and giving the entire thing a good
sanding, I added thin trim around the
drawer fronts and some decorative base molding along the bottom of the dresser
body.
After caulking around all the edges and adding a coat of primer, it was already looking like
a completely different dresser.
I spent about an hour fiddling with the drawer slides trying to get them to line up and ended up
replacing almost all the original screws.
For the top, I cut pieces of 1 x 4 lumber the same width as
the dresser and using my Kreg Jig, added pocket holes along the long sides of
the boards so I could join them together.
The pocket holes are on the bottom of the boards, so once the top was
screwed onto the dresser, all the pocket holes were hidden. I trimmed it out with the same thin molding
I’d used around the drawer fronts to tidy up the edges and stained it with the
same rich chestnut colored stain I used
on this desk. After the stain, I
finished it off with four coats of polyurethane for a beautiful glossy finish.
Because I painted the body of the dresser a soft cream, I finished
it with a couple coats of my favorite non-yellowing water based polycrylic top
coat.
With a few of the original drawer pulls missing, I decided
to fill the original holes in case I wanted to go with a single drawer
pull. Once the paint and stain was
finished though, I decided to go back to two pulls. I must have picked up at least a dozen
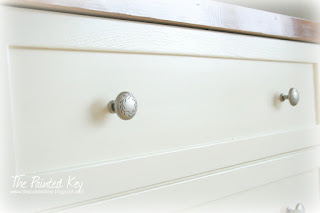
different ones to try, but finally decided on these 1-1/4” pulls in a weathered
nickel finish and a vine design etched on the front.
And a quick before & after
I’m thrilled with the way this little dresser turned
out. It’s the perfect size for a small
space and would also work well as a spacious bedside table. It'll be available in my shop soon!
Thanks for popping by!


I have a dresser very similar to your "before". I love the character you were able to add to it.
ReplyDeleteThank you so much! :)
ReplyDelete