Tuesday, December 1, 2015

Custom Rustic Style Tree Wall Shelf

My new rustic style tree wall shelf! When I came across this piece, I knew I had to build one pronto!  It turned out even cuter than I imagined!  SO, I decided I just had to share this adorableness!


The shelves are perfect for little keepsakes, ornaments or pictures.  Or add some cute little burlap numbered bags for a sweet little advent calendar.  No fireplace mantel?  The hooks are perfect for hanging stockings!

I can build you your very own for $65 each (with a $25 deposit) and you can choose the stain colour. Each shelf will be handmade by me. Approx 32" tall x 20-1/2" wide. My example shelf was stained in English Chestnut.


Because of the size, I anticipate shipping would become quite costly, so I'll have to stick with local orders only. 

These three shelves were delivered to a very happy client this morning!


I added a simple little tag to finish it off and express my appreciation for shopping local and supporting a small business! :)


If you're interested in purchasing a custom shelf, definitely send me an email at thepaintedkey@gmail.com

Thanks for popping by!


Wednesday, October 14, 2015

My Juliet Nightstand


This sweet little nightstand is the perfect addition to any room.  Inspired by the Juliette Nightstand from Pottery Barn Kids, I wanted to create it using some leftover materials I had from previous projects. 


The top, sides and shelf were constructed from mdf.  The legs were cut from a spruce 2x4 that I ripped down on my table saw to a square 1.5" x 1.5" post.  The adorable little curvy “feet” are actually from a pine stair baluster!  I chopped it down into pieces and by drilling a small hole in the top of the “foot” and the bottom of the table leg, I was able to glue them in place with no worry of them moving around.


The drawer interior was built from 3/8” plywood.   I cut a dado groove along the bottom for a 1/4" plywood base to fit in.  The drawer was then installed with simple white drawer glides.  The adjustable lower shelf sits on simple chrome shelf pins so it’s quick and easy to adjust.


The soft white paint colour and clear coat in a satin finish was perfect for the table.  And of course the glass drawer pull was the finishing touch!

This lovely little table has been sold.

Thanks for popping by!


Monday, July 27, 2015

Dresser & China Cabinet


Hello, hello!!!

I realize it’s been AGES since I’ve posted anything, but although things have been quiet on my blog, I have actually been working away.  Of course, with my kids on summer holidays my painting tends to take a back seat, but I’ve been sneaking out to paint when I have the opportunity.  If you’ve popped over to visit my facebook page you will have already seen these, but I thought I should share them here as well.

A couple of the projects I worked on and completed.

I actually agreed to purchase this dresser after only seeing a picture online.  I was drawn to the unique carved design on the front and the lion-head drawer pulls on the top drawers.


I painted the top a dark espresso with a glossy clear coat.  The bottom was painted white followed with a dark glaze to really draw out the details of the dresser.  The original hardware was updated in an oil rubbed bronze colour.


This next big project was this china cabinet.  I'd had it sitting waiting its turn for too long and it was high time it was refinished!  


I stripped the paint off the top of the bottom portion and stained it a darker colour followed by a glossy poly.
 

The remainder of the cabinet was  painted a light grey and then also followed with a darker glaze.  I replaced all the old/damaged hardware with new brushed nickel and removed the dated glass and added a simple hardware cloth.  The original back panel was damaged so I also replaced that with a brand new piece.


Both pieces have been sold.

Thanks for popping by!
 

Sunday, May 17, 2015

Reclaimed Beauty


I picked up this piece as part of a set last year which also included a dresser and pair of side tables.  I refinished all but this one.  I wasn’t actually sure what to do with it!  It was an odd piece.  The base was square, but the top had a sort of triangular top that just seemed awkward.  I actually forgot to take a "before" picture, so this is the one I originally pulled from the sellers ad.


Because I’m on a mission to clear out my workshop and actually give myself more room to work, I knew this piece had to be finished sooner than later.  The top was long gone (I got rid of it shortly after I got the piece home) but debated what tdo replace it with.  I finally decided I would use reclaimed lumber.  Sadly, once I actually started piecing it together, I realized the lumber I had wasn’t going to work the way I wanted and really only had one good piece to use.  I decided to work with it and just used a couple new pieces of lumber as well which I distressed before staining.  I also added a simple French inspired transfer before finishing it all off with a glossy poly.


I started with a  light grey on the base and decided to add a dark glaze to give it a little depth.  I also tried a new clear coat product suggested by my local Benjamin Moore retailer.  It’s a water based clear varnish but in a “dead flat” finish.  I love the way it looks!  It has a subtle sheen which I find gives the look of a waxed finish.  I likely won’t use it on all my pieces as I still love the modern look of a glossy piece of furniture, but for a slightly more vintage look I wouldn’t hesitate to use this finish again.


I chose to use the original hardware on the bottom drawers.  They were originally a dated brass look and so after a few different paint colors, the updated finished look reminds me of aged zinc. A pair of glass drawer pulls on the top add just a little sparkle.

While I normally line the drawer interiors with a vinyl, I chose to leave these as is.  The original vintage-.look paper already in them just finish off the piece perfectly.


I’m so happy with the finished piece.  I honestly didn’t have much of a plan when I started on it and just let it develop as I went along. 

If you would like to add this piece to your home, please let me know.  Now available in my shop. 

Thanks for stopping by!


Tuesday, February 17, 2015

Grain Sack Inspired


What started off as a very old and well-worn dresser ended up blossoming into…um…another old and well-worn looking dresser.  Wait, what?   


Well, the finished result was not actually what I had originally envisioned!  When I first looked at this dresser with its loose joints, missing drawer pulls, drawer bottoms cracked and broken and the wood covered in ink and paint, my first thought was “RUN!”.   


Maybe I should have actually listened to my gut instinct on that one.  Instead, I decided to give it a chance and with some pretty paint I could make it look new again. 

I started by “removing” the original drawer bottoms.  And when I say removing, I mean smashing them with a hammer until they fell out in jagged small pieces.  Over the years, this poor dresser had obviously gone through some not-so-awesome “repairs”.  Screws drilled through the drawer fronts in an attempt to tighten up some dovetail joints and drawer bottoms nailed and then glued in place with what I can only assume was some heavy duty cement or something!  Yikes.  They were also badly stained and were definitely showing their age.  I knew I had no choice but to remove and replace them with something new.

My original inspiration for paint came from a picture I came across of some beautiful vintage grain sack pillow covers.  

I thought the same look would be great for the dresser.  Sounds simple, right?  Apparently this dresser decided it didn’t want to look new.  Problem after problem I finally got frustrated and decided to “attack” it with my orbital sander….and attack is probably the right word.  I was tempted to sand the thing to a big pile of sawdust.  But then, something “magical” happened and as more of the paint came off, I started to see something more beautiful develop.  While a heavily distressed finish isn’t something I normally aim for, I loved it and knew it was definitely the way to continue with this piece.


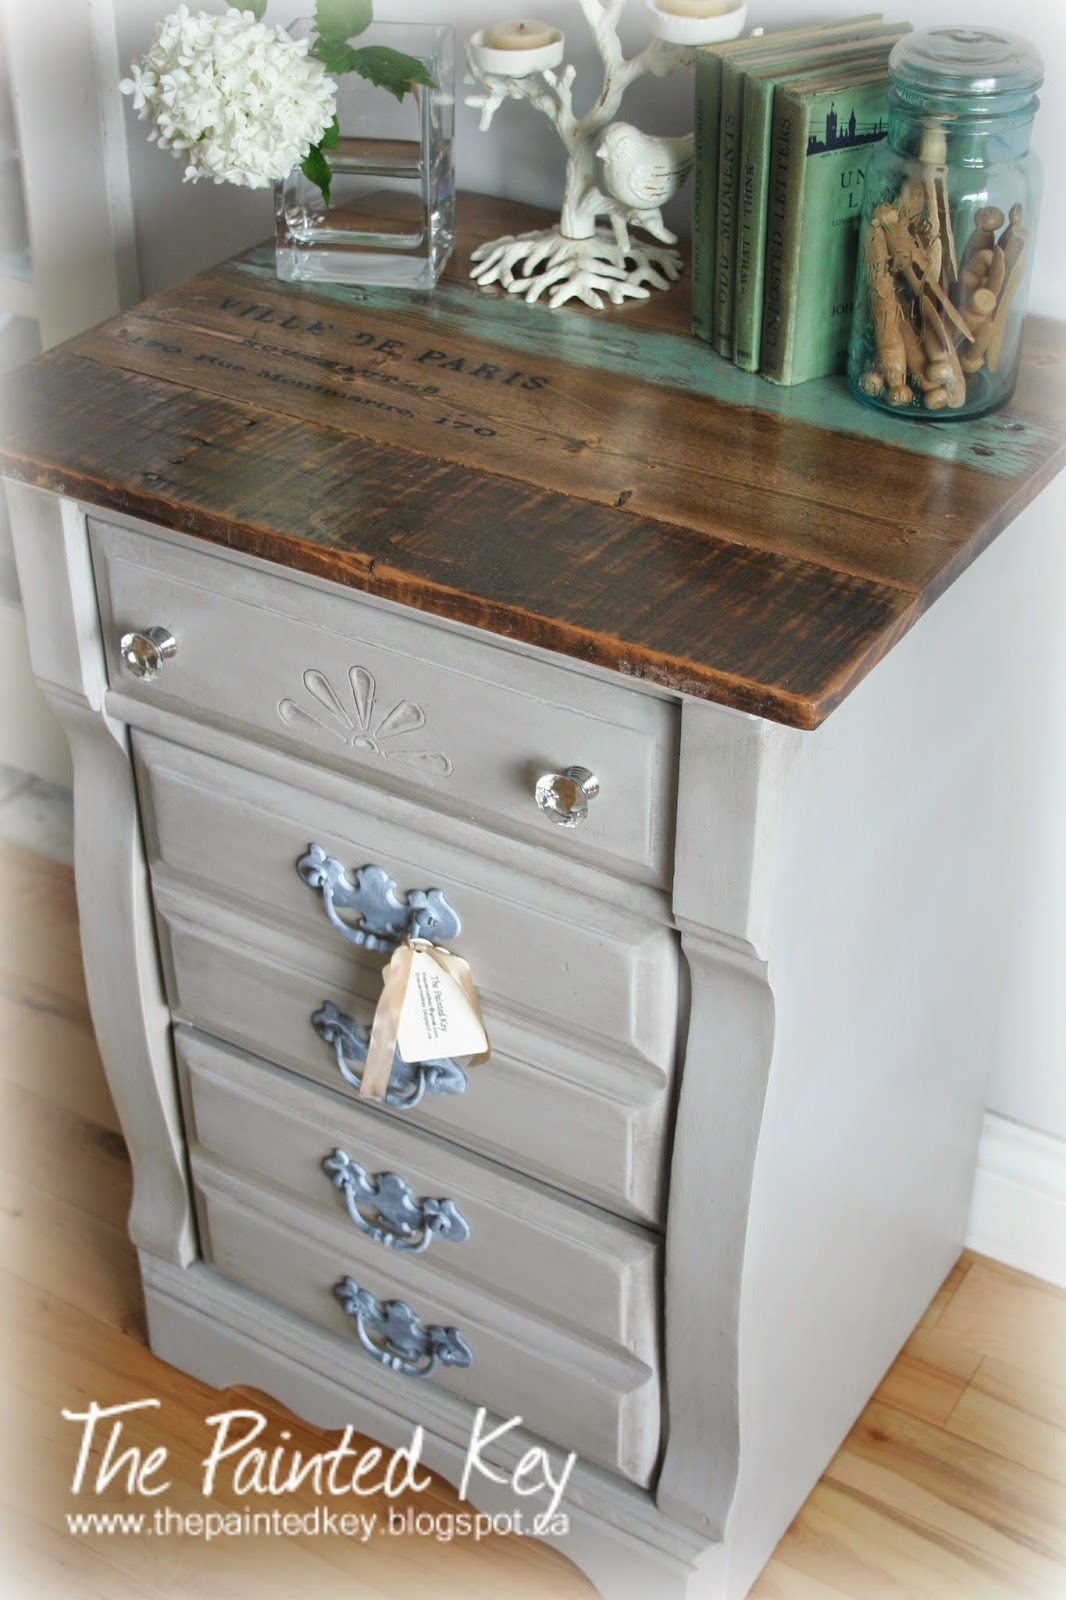
One of the things that really caught my eye when I originally looked at the dresser were the sweet little round key plates on each drawer.  

Sadly they seemed to almost disappear against the original wood drawers, so I love how they stand out against the light paint color now.   

Because some of the original drawer pulls were missing or damaged, I chose to buy all new and picked a very simple pull that matched the key plates.  Love it!

After all the frustration and work that went into this dresser, I have to say I am thrilled with it.  Dresser is now listed and available for purchase.

Thanks for stopping by!