SO excited to share another before and after project I
finally finished!
This poor chair was
started a LONG time ago (ahem, 2010) and then left in our garage waiting for me
to find just the right fabric to cover it with.
When I originally purchased the chair, it had been poorly
painted with a glossy black paint. The
fabric it had been covered in was definitely not what I would have chosen. I wish I’d taken a picture of the original
fabric on the back. It was pretty hideous and didn't match the front at all!
I decided to paint the chair a glossy white and lightly
distressed it to allow a little of the original black to show through. The seat and front side of the back rest were only held on with
a couple screws and some staples, so they were easy to remove. After removing the old fabric, I was able to
easily wrap my new fabric around the pieces and staple them in place. I forgot to take pictures of this part! Oops!
The front and back of the back rest were two separate pieces. After attaching the front piece, I decided to add
two button tufts for a little subtle detail.
I used the same
buttons I used on our upholstered headboard so I could cover them in the
matching fabric. After drilling a hole
through the wood backing, I threaded a long upholstery needle with a piece of
soft nylon drapery cord. I pushed the needle
through the chair, threaded on a button and then pushed the needle back through
to the back.
Before tying a knot, I
added a small metal washer on one piece of the cord.
This prevents the knot from slipping through
to the front of the chair and helps to cinch up the cording while I’m tying the
knot….or eight.
Hey…I wanted to make
sure that cording wasn’t going anywhere!!!
Because the backing is only a thin ¼” thick piece of wood covered in
a very thin foam, I used my heavy duty stapler to
reattach it to the chair.
I knew I would
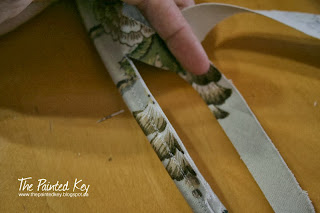
have to cover up the staples, so I decided to try my hand at sewing some double welt cording. It was so simple to make! After cutting my fabric on the bias
(important if you want your fabric to lie smoothly around the corners!), I
wrapped it around TWO pieces of cording, both cut long enough to go around the
entire back of the chair. With my zipper
foot in place, I sewed the fabric, enclosing the cords inside.
After sewing, I shifted the cording a bit
with my fingers so the seam was closer to the center of the two cords rather
than along one edge. I hope that makes
sense – again, I forgot to take a picture.
Once that was done, I switched over to my regular sewing foot and
carefully stitched down the center along the front between the cords.
I trimmed the excess fabric off close to the
stitching along the back and then actually used my hot glue gun to attach it to the chair!
I had originally planned to only apply the double welting along the back, but when I held it up along the front of the chair, I knew it had to go there too! It just finished it off so nicely!
I’m happy with the way this chair turned out. So much lighter and cleaner looking than the
before. I’ll likely list the chair for sale at
some point, but for now it’s being used for staging at the townhouse.
Thanks for visiting!


Love the detailing of the double welting/cording. It does add a special touch to the chair. I think I need to come walk through the townhouse and see all the work you have done. You have been busy!!
ReplyDelete